How to use the Server Configuration screen
- Nathaniel Watson
- Grady Hooker
- Adam Fleming
To create a new NautDrafter drafting server, you'll use the Server Configuration screen. There are a few things you can can customize about your new server.
Getting to the Server Configuration Screen
To get to the Server Configuration screen, you'll need to have logged in as a player and made it to the Server Browser screen. On the Server Browser screen you should see a button labelled Host New Game. Click that and you'll be taken to the Server Configuration screen.
Screenshot: The 'Host new game' button highlighted on the Server Browser screen
![]()
Configuring your Server
The server configuration screen should look something like the image below:
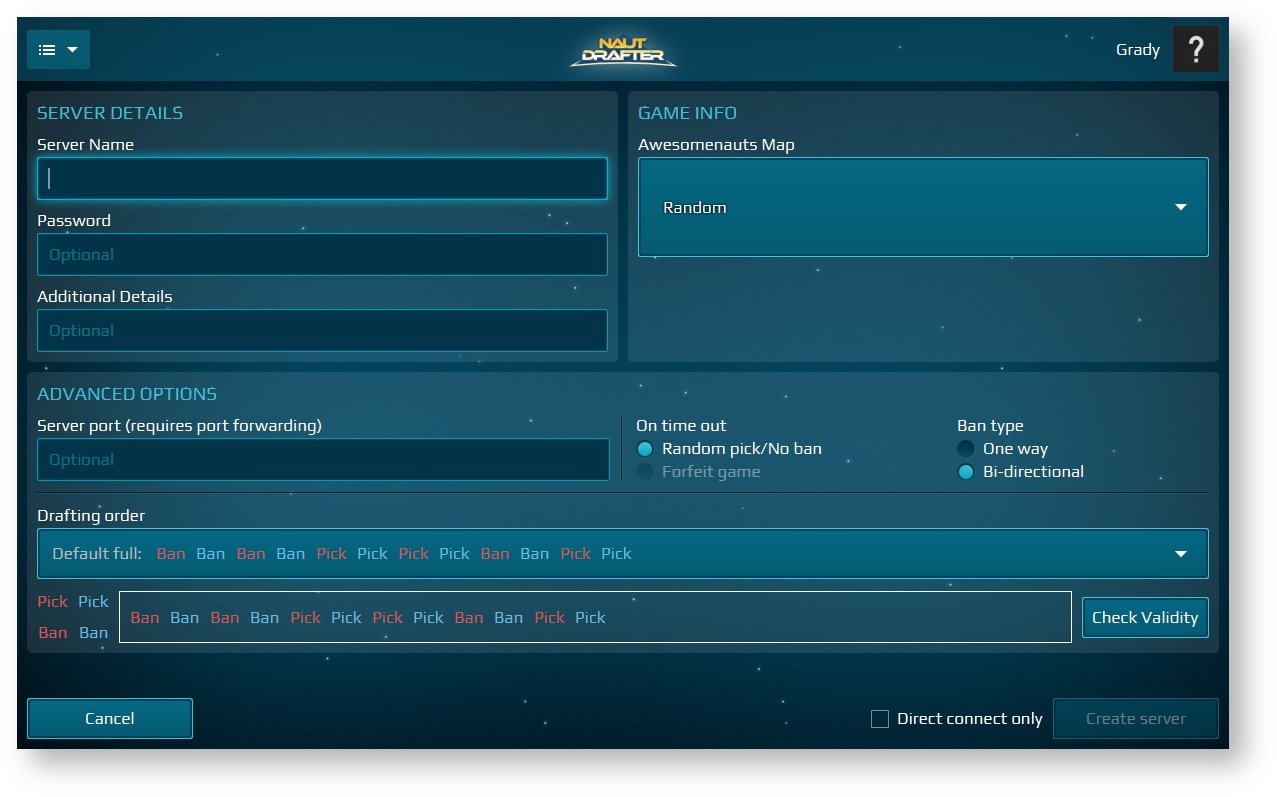
There are several fields you can fill out to make you server fit your needs. These are described below. Once you've entered the details of your server, click the Create server button in the bottom-right of the window to create your server. Once you've clicked this button, a loading indicator will appear and your server should be created after a few seconds. Upon the successful creation of your server you'll be taken back to the Server Browser screen. If there's anything wrong with your server configuration or it looks like other players won't be able able to connect to you, a notification will be shown when you press the Create server button.
The only information you have to enter in order to create a server is a name. It's good to use something creative and unique.
Server Details
Server Name: The name or title of your server. Cannot be longer than 255 characters.
Additional Details (optional): Any additional details about your server that you want to be displayed under the server's title on the Server Browser screen. Also must be no longer than 255 characters.
Password (optional): If you only want people you know joining your server, this is the setting for you! Players and spectators joining the server must enter the password you specify in order to access the server.
Game Info
These details are just to provide a bit of additional information to people joining your server - the options you choose won't affect the drafting process in any way.
Awesomenauts Map: Choose the game map you plan on playing once the drafting has finished.
Advanced Options
These options enable you to further configure your server and the drafting process
Server port (optional): The network port you want your server to use. This will likely require you to configure your router to forward this port to the same port on you computer. More details can be found on the Hosting a Drafting Session page.
If this field is left blank, NautDrafter will use UPnP (Universal Plug and Play) to automatically port forward for you. However if UPnP is disabled on your router, it will fail to connect.
On time out: What should NautDrafter do if a team runs out of bonus time during drafting? Currently forfeit is not implemented so the only option is a random pick when it is a pick phase and skipping the ban when it is a ban phase.
Ban type: You can set whether you want bans to effect both teams (Bi-directional) or only the opposition (One way).
Drafting order: Here you can determine the order of the drafting process that will be used for drafting games/session played on your server.
Screenshot: Customizing the drafting order for a server.
Start by using the drop down menu to choose a preset, then, if you want to customize the schedule further, click-and-drag the pick and ban items in the white box until you've created your preferred schedule.
To add more items to the the drafting schedule, click and drag any of the four pick and ban items on the left and drop them into the white box. The box will turn yellow when you are able to drop an item in and will expand to show where the item will be placed. The pick and ban items are colour-coded to show which team will perform the action.
To re-order the schedule, you can drag around items in the white box and drop them in any place in the schedule.
To remove an item from the schedule, just drag the item to anywhere outside the white box and release your mouse.
Important
By customizing the drafting schedule, you may accidentally create an invalid schedule. To make sure you have made a valid schedule, click the "Check Validity" button.
If there is anything wrong with your schedule, a notification will tell you what's wrong. If it is valid a notification will tell you so.
When you click the Create Server button the validity of the drafting schedule will be checked. If it is invalid a notification will appear to tell you what needs to be fixed. You will have to fix the error and click the button again before the server will be created.
To be a valid drafting schedule it must meet a few requirements:
- 3 picks for the red team
- 3 picks for the blue team
- An equal number of bans for the red and blue teams
- A maximum number of 3 bans for either team
- Red can not have a ban phase after blue have had all their pick phases and vice versa
Direct connect only: This check-box will decide if your server will be listed on the Server Browser screen or can only be connected to using Direct Connect.